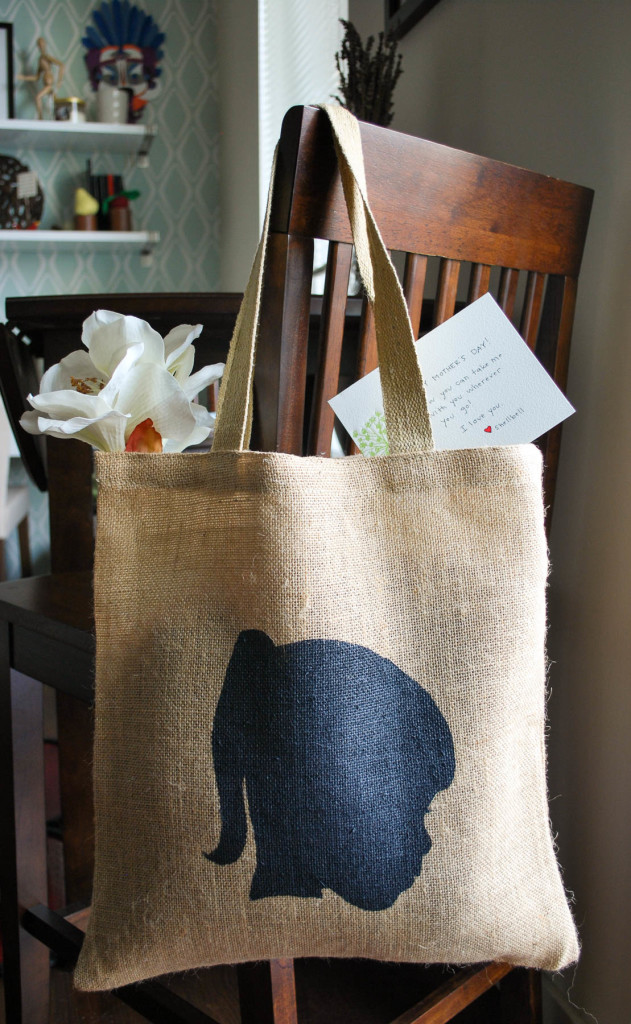
Silhouettes are a trend that never go out of style. As a Mother’s Day gift this year, I wanted to take the time to craft something that my mom would really love and cherish. I liked the idea of creating a silhouette art piece to hang on the wall (as seen all over Pinterest) but then thought it would be more fun to put it on a tote bag – that way she can take me with her wherever she goes! On one side is a silhouette of 4 year old me and on the other is a silhouette of my grown up profile. Mom adored this detail!
I’m excited to share this tutorial with you as it makes a great gift for any occasion.
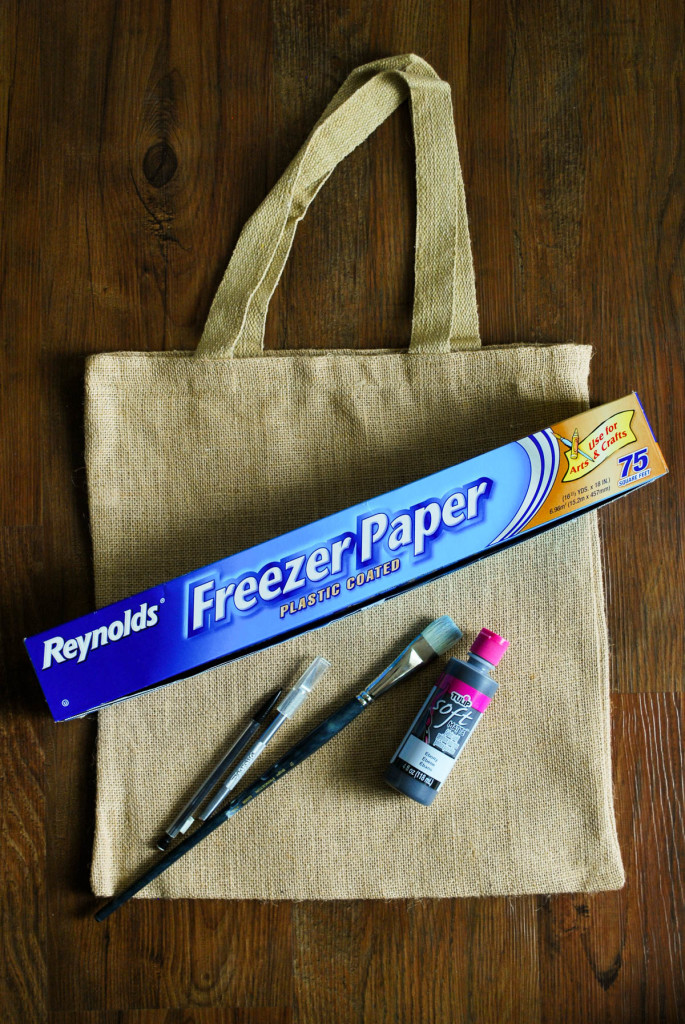
Here’s What You’ll Need:
- Blank tote bag (I used a jute tote bag, but note that smoother fabrics with tighter weave like cotton or canvas will be easier to work with than fabrics with rougher texture)
- Freezer paper (available in most grocery stores)
- Iron
- Cardboard
- Fabric Paint (I used Tulip Soft Fabric Paint in matte black)
- Craft knife
- Paintbrush or foam brush
- Pencil
Directions:
1. The first step is to create your silhouette. I used this video tutorial from Jones Design Company. It was so easy — but I know “easy” is relative, so don’t be discouraged if you find this method too complicated. There are lots of ways to easily make a silhouette that you may find more doable. Click here for an example. Note that Adobe Illustrator software is required if you decide to follow the same tutorial I used. You can sign up for a free 30-day trial of the Illustrator software app, which is what I did, and I ended up liking it so much that I purchased regular access.
Here are the photos I used to create my silhouettes.
2. Print out your silhouette. I stretched my image to fit a regular 8.5 x 11″ piece of paper.
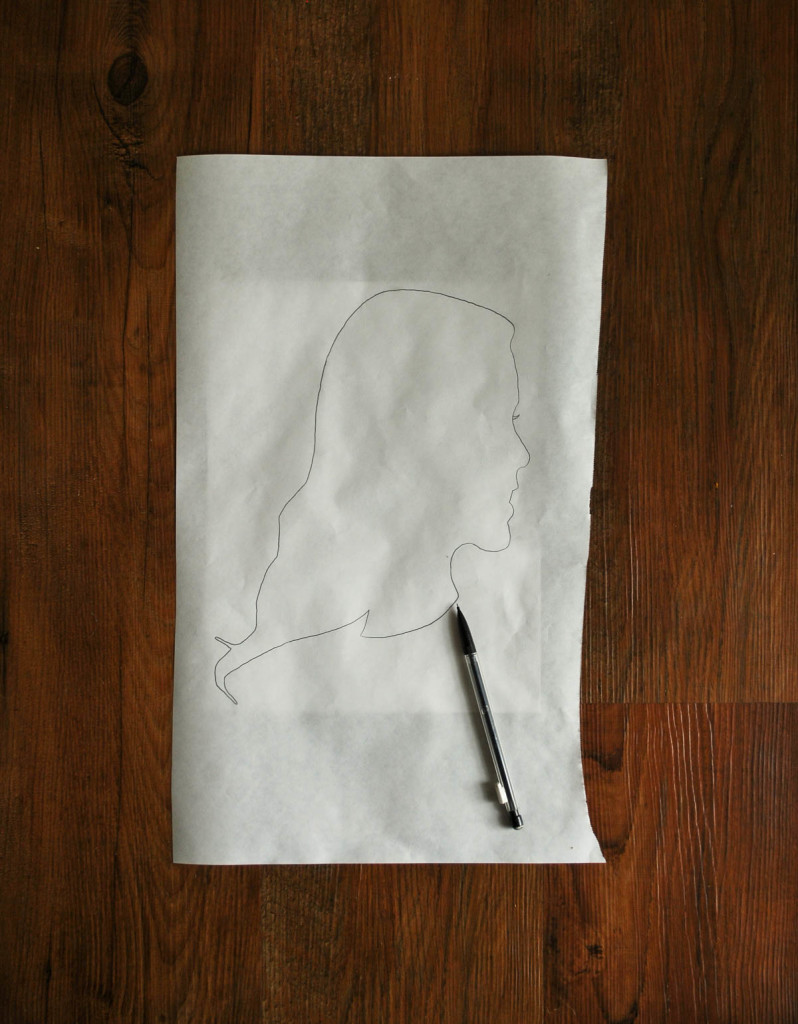
3. Tear off a piece of freezer paper to about the size of your tote. Trace the outline of your silhouette on the uncoated side of the paper.
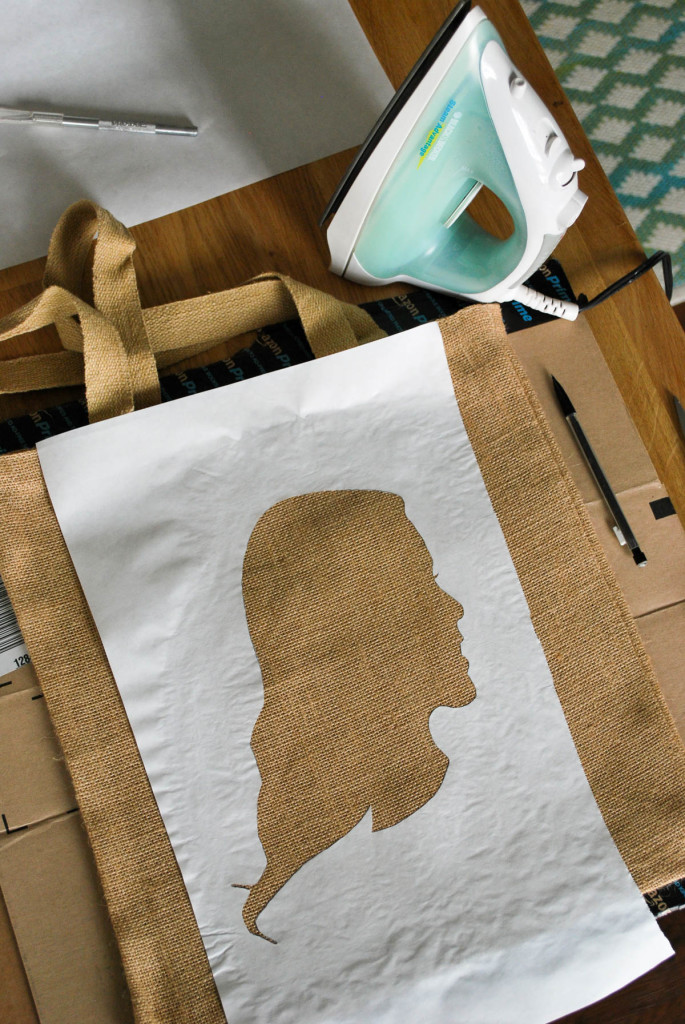
5. Using a craft knife or scissors and a cutting mat or piece of cardboard cut out your silhouette, creating a stencil. Be especially careful cutting around the facial features.
6. Heat an iron to the setting recommended for your fabric (mine was on one of the hottest settings). Position the stencil on the tote, coated shiny side down, and iron it to the bag. Smooth out any bumps and wrinkles as you go ensuring all the edges of the cut-out are well adhered to the bag. Note that if you use a jute fabric bag as I did, some edges may not adhere well – you’ll just need to be more careful with painting to prevent paint from seeping under the stencil.
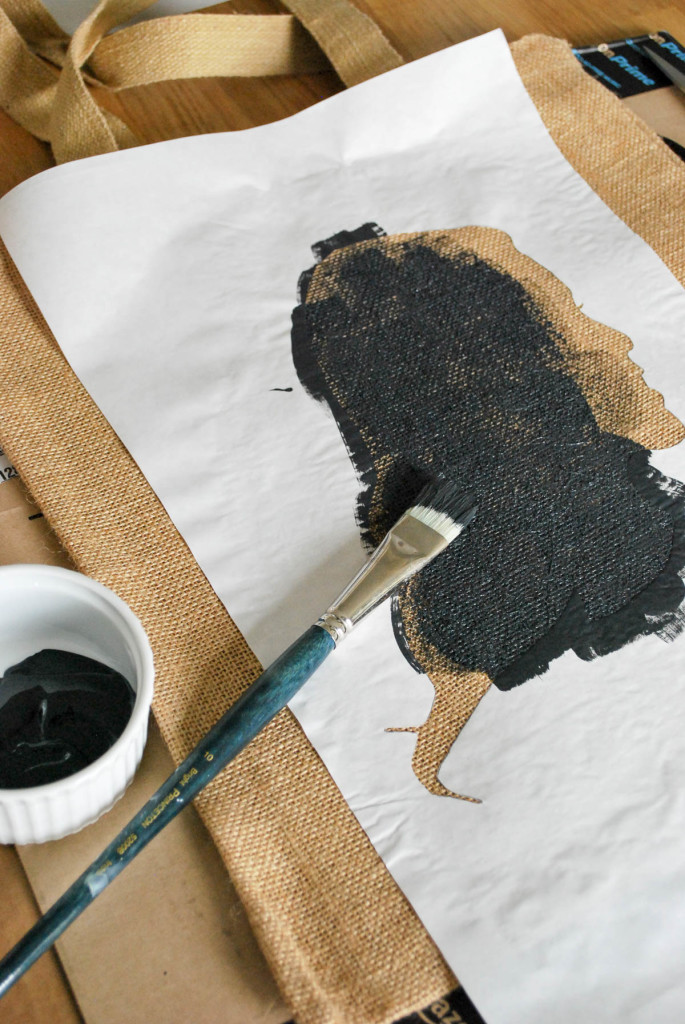
7. Place a sheet of cardboard inside your bag to prevent paint from soaking through to the other side. Using a paint brush or foam brush, apply fabric paint. I found I got the cleanest edges if I started my paint brush on the paper on the edge of my stencil and dragged the paint inward to the center of the cutout portion. I’m not sure this was the best explanation, so feel free to leave a comment if it doesn’t make sense and I will try to explain more clearly.
8. Allow paint to dry for at least 4 hours before flipping bag and painting the other side. When paint is dried, carefully peel back the stencil to reveal your beautiful silhouette! {I couldn’t wait and peeled it off right away while still wet and had no trouble – just be very careful not to smudge any paint on your tote}
Happy Crafting! Let me know if you make this tote or other silhouette project. Feel free to share with me on Instagram or Facebook using #shellymadeblog.









Leave a Reply